

PRE-PRODUCTION
Welcome to the preproduction phase, where creativity takes shape in the digital realm. This page serves as a visual journey through the meticulous process of bringing my vision to life. Dive into the intricate world of sketches, reference images, storyboards, 3D layouts, topology trials, and texture and rigging plans that form the foundation of my 3D modeling endeavors.
Project A1
For my main semester project, I decided to turn a concept art from the movie Klaus into a 3D environment. For this, I did a scene plan, followed by the storyboard , Animatic and 3D layout in which I show how I plan to show the main render, wireframe pass, and AO pass
Color Plan
Beginning this project involved meticulous scene planning, ensuring each 3D prop's significance within the composition. I strategically highlighted specific props, maintained clear ground-to-prop separation for organizational clarity, and introduced a purposeful color plan to the storyboard

STORYBOARDS A1
In crafting the storyboard for this 3D set, the focus was on meticulously planning the visual narrative that would highlight each 3D prop and shape the overall composition of the scene. The process began by envisioning the key elements within the set and determining the most effective way to showcase them. Each frame of the storyboard became a strategic decision, outlining camera angles, lighting, and prop placements to maximize visual impact.


ANIMATIC& 3D LAYOUT
This dynamic animatic and 3D layout functions as a storyboard preview, providing a sneak peek into the upcoming final render of our intricately designed 3D set. Offering a comprehensive scene overview and emphasizing detailed props, it guides viewers through dynamic camera movements, conveying the intended lighting and atmosphere. The transition strategically showcases and highlights the main props, offering a closer look at the proper topology of each element. This animatic serves as a visual roadmap, offering insights into the meticulous details and visual elements that will define the ultimate rendering of our 3D set.


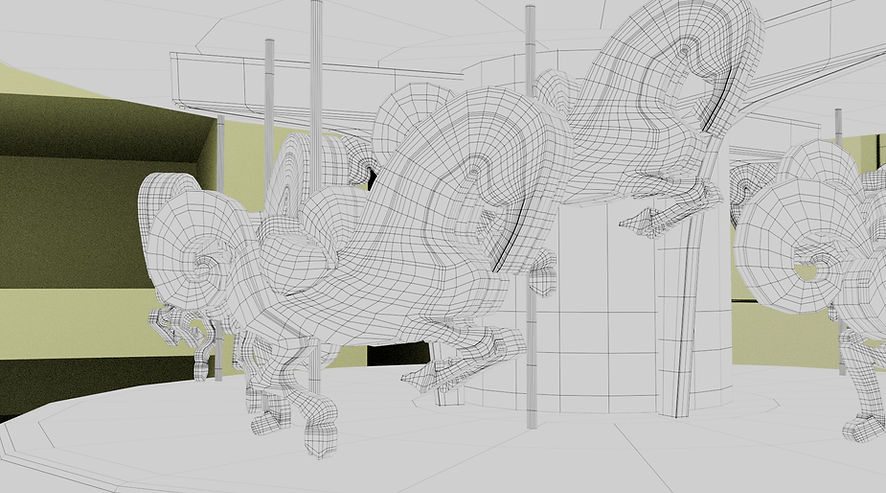
First BLOCKING & LIGHTING PASS
This was the first submission I made for teacher review and feedback. I took extra effort to make as clean topology as I could


Topology Corrections
After the first blocking pass, I took some extra time to reduce the number of polygons and the overall topology of the prop

Project B1
For my second semester project, I designed and created a street cart. I went for a cute and original design, inspired by fruit and sweet carts from my home country. I started with a rough sketch, followed by its orthographic views and blocking pass. I also made storyboards, animatic, and 3D layout with the rendering plan
Sketches & orthographic vieWS
This is the main idea I had for the cart design, followed by a proper turnaround


First BLOCKING & LIGHTING PASS
This was the first submission I made for teacher review and feedback. trying to be as accurate to the turnaround as possible


Topology Corrections
Just like with the main project, I corrected some minor topology issues. mostly with the handles and trays


Mini Projects -Train-
This semester I had the chance to design, model, and rig a toy.
I decided to go for the classic wooden train, old-school style, first I did a rough sketch, followed by the main blocking and any suggestions my professor gave me
CONCEPT & INSPO


BLOCKING PASS
For the modeling step of this project, I wanted it to be as low poly as possible, I went for a fun and friendly design testing deformation with lattices and clusters.


Textures
The train is emulating a wooden toy train, I kept most of the model with the same wood material, just the umbrella has a plastic texture since is rigged and is supposed to bounce

